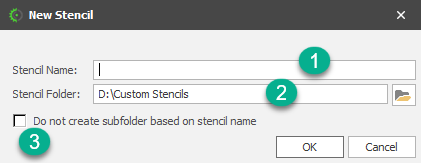
You create a Basic Stencil from Stencils | Create | Basic

(1)Stencil Name: This is the name/label you will give the stencil.
(2)Stencil Folder: This is the folder the stencil will be created in.
(3)Do Not Create Sub folder: Normally, the sub folder created under (2) for the stencil files assumes the stencil name. However, when this is checked, it means that the files will be created in the root folder, in the case of the screen shot above, that will be "D:\Custom Stencils".
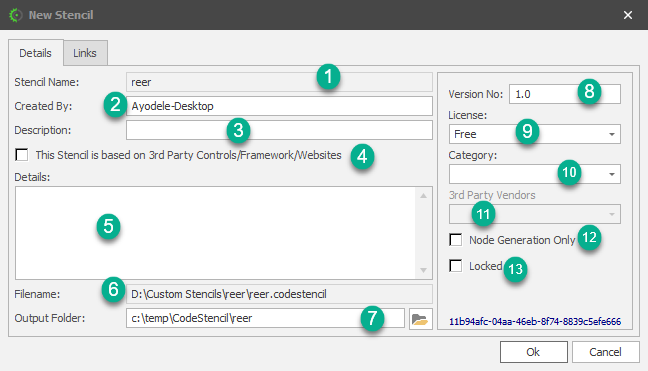
After you click OK to save, you will be presented with another form that will allow you to add more details about the stencil. See "Details" below:
(1)Stencil Name: This is the visible name the stencil will be recognized by. (2)Created By: This is the name of the creator of the stencil (3)Description: A single line description of the stencil (4)Stencil Type: When this is checked it indicates that the stencil being created is not an original design but is based on 3rd party controls or frameworks, or code from websites. (5)Details: More details on the website can be provided here. (6)Filename: This is if the full path of the stencil (7)Output Folder: This is the folder your code will be generated into. (8)Version Number: This is the version number of the stencil (9)License: This is the type license to assign to the stencil (10)Category: This is the category of the stencil. (11)3rd Party Vendors: (12)Node Generation Only: When this is checked, it means that you can never generate the entire stencil at once. You can only (13)Locked: Stencil are usually locked before deployment. |
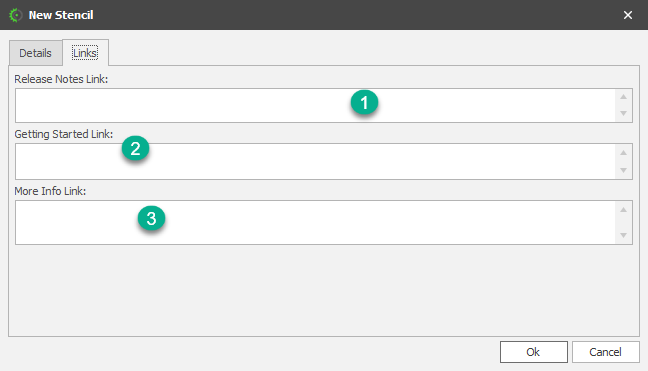
(1)Release Notes Link: Here you can add links for your release notes. (2)Getting Started Link: Here you can add links to your getting started documentation (3)More Info Link: Here you can add links to more information.
|

